 NEWSLETTER
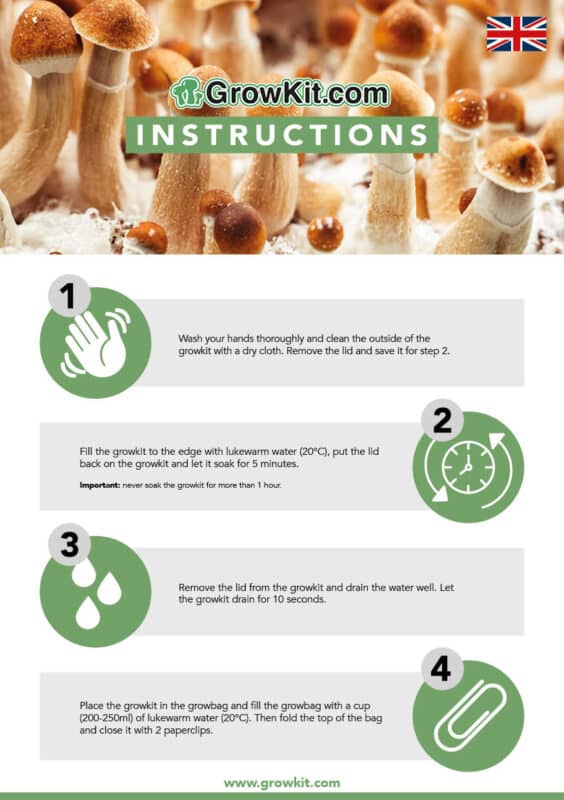
Tip 1Make sure your grow kit is always moist. It is also important that the grow kit does not dry out between steps 5 and 6. In this case you can open the bag and moisten the grow kit again. |
 |
Grow Kit Instructions
Welcome to the Grow Kit instruction page of The Headshop. Below you will find the latest Grow Kit instructions. Make sure to follow them carefully. Every step is important and will have an effect on the results of your Mushroom Grow Kit. Please note: underneath you will find our grow kit instructions. There are two different sorts.
General grow kit instructions
These instructions are applicable to all grow kits except the Hawaiian Copelandia Cyanescens.
Click hereHawaiian Copelandia Cyanesens instructions
These are only applicable to the Hawaiian Copelandia grow kit an need extra attention.
Click hereFollowing precise instructions and taking good care of your magic mushroom growing kit is the most important part when growing your own magic mushrooms. In short: be sterile, use clean water and follow the instructions that you will find below.Mushrooms are part of nature and therefore all grow differently. No matter how many times you have set up a grow kit, every time can be different. Always follow the instructions carefully. This way you will also be able to achieve the largest harvest. Happy mushroom growing!
General grow kit instructions
Step 1
Wash your hands thoroughly and clean the outside of the growkit with a dry cloth. Remove the lid and save it for step 2.
Step 2
Fill the growkit to the edge with lukewarm water (20°C), put the lid back on the growkit and let it soak for 5 minutes. Important: never soak the growkit for more than 1 hour.
Step 3
Remove the lid from the growkit and drain the water well. Let the growkit drain for 10 seconds.
Step 4
Place the growkit in the growbag and fill the growbag with a cup (200-250ml) of lukewarm water (20°C). Then fold the top of the bag and close it with 2 paperclips.
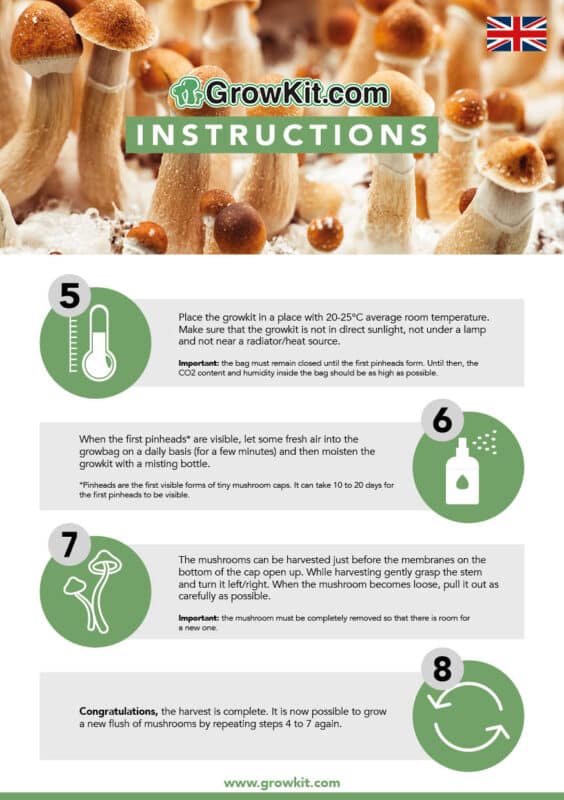
Step 5
Place the growkit in a place with 20-25°C average room temperature. Make sure that the growkit is not in direct sunlight, not under a lamp and not near a radiator/heat source. Important: the bag must remain closed until the first pinheads form. Until then, the CO2 content and humidity inside the bag should be as high as possible.
Step 6
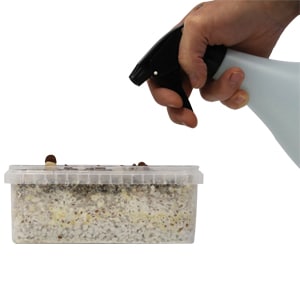
When the first pinheads* are visible, let some fresh air into the growbag on a daily basis (for a few minutes) and then moisten the growkit with a misting bottle. *Pinheads are the first visible forms of tiny mushroom caps. It can take 10 to 20 days for the first pinheads to be visible.
Step 7
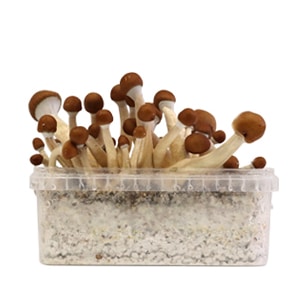
The mushrooms can be harvested just before the membranes on the bottom of the cap open up. While harvesting gently grasp the stem and turn it left/right. When the mushroom becomes loose, pull it out as carefully as possible. Important: the mushroom must be completely removed so that there is room for a new one.
Step 8
Congratulations, the harvest is complete. It is now possible to grow a new flush of mushrooms by repeating steps 4 to 7 again.
Tip 2Handle your grow kit with care, this will increase the chance of a better yield during a next flush. |
 |
Tip 3Are you unsure when to pick your mushrooms? Early picking is better than too late. |
 |
Tip 4A low temperature can result in a non-functioning grow kit. Make sure the temperature never drops below 20 degrees. Pay attention to this and don’t lower temperature at night. |
 |
Hawaiian Copelandia Cyanesens instructions
Below you will find the instructions for the Hawaiian Copelandia growkit. This growkit needs extra attention, read the instructions carefully.
Step 1
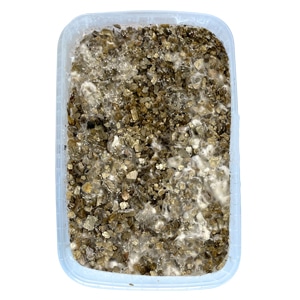
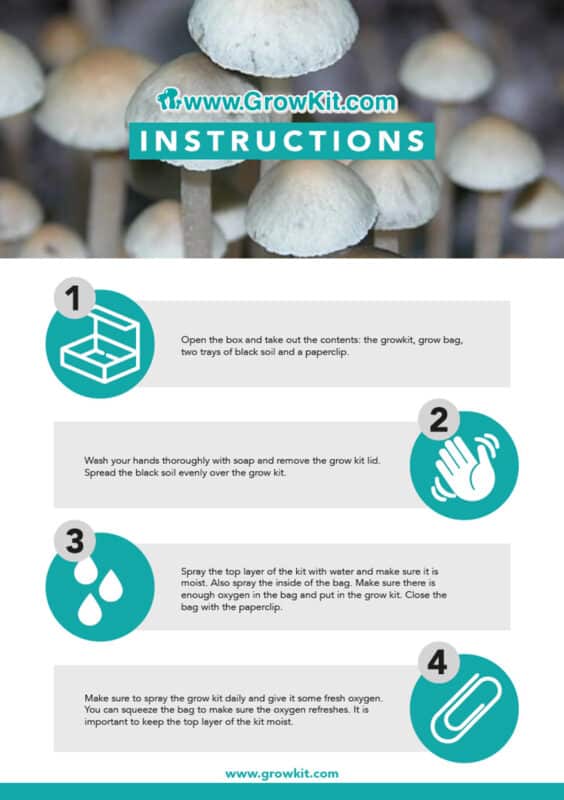
Open the box and take out the contents: the growkit, grow bag, two trays of black soil and a paperclip.
Step 2
Wash your hands thoroughly with soap and remove the grow kit lid. Spread the black soil evenly over the grow kit.
Step 3
Spray the top layer of the kit with water and make sure it is moist. Also spray the inside of the bag. Make sure there is enough oxygen in the bag and put in the grow kit. Close the bag with the paperclip.
Step 4
Make sure to spray the grow kit daily and give it some fresh oxygen. You can squeeze the bag to make sure the oxygen refreshes. It is important to keep the top layer of the kit moist.
Step 5
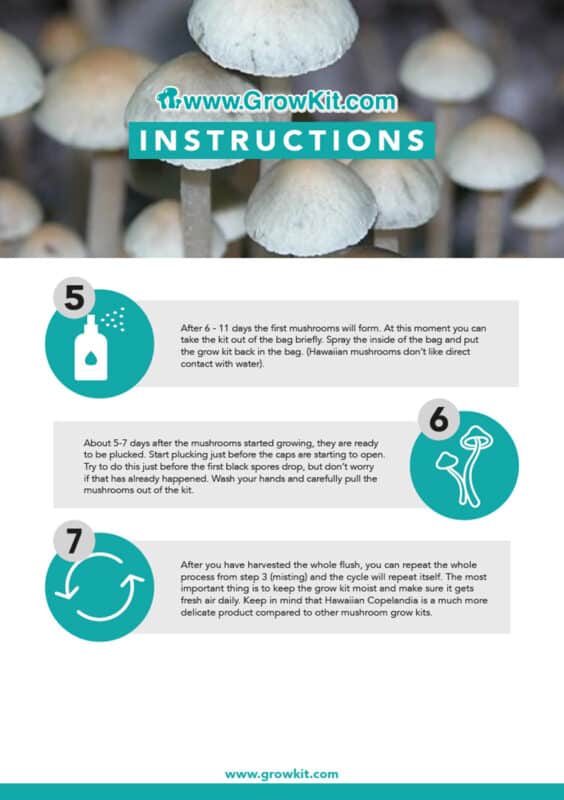
After 6 – 11 days the first mushrooms will form. At this moment you can take the kit out of the bag briefly. Spray the inside of the bag and put the grow kit back in the bag. (Hawaiian mushrooms don’t like direct contact with water).
Step 6
About 5-7 days after the mushrooms started growing, they are ready to be plucked. Start plucking just before the caps are starting to open. Try to do this just before the first black spores drop, but don’t worry if that has already happened. Wash your hands and carefully pull the mushrooms out of the kit.
Step 7
After you have harvested the whole flush, you can repeat the whole process from step 3 (misting) and the cycle will repeat itself. The most important thing is to keep the grow kit moist and make sure it gets fresh air daily. Keep in mind that Hawaiian Copelandia is a much more delicate product compared to other mushroom grow kits.